Do these 3 things before closing this tab:
1Repair Windows errors before they cause bigger problems2Scan for outdated or missing drivers - takes under a minute3Clear out junk files and repair common Windows errors
ThatPainter is reader-supported. When you buy through links on our site, we may earn an affiliate commission. Learn More
Apple Photos is capable of far more than one-tap filters. Its non-destructive editor can crop and straighten, correct exposure and color, shape tones with curves and levels on Mac, remove small distractions, and keep edits synchronized across Apple devices when iCloud Photos is enabled. The reliable way to get professional-looking results is to use a consistent order: compose first, correct light and color, add style sparingly, clean up carefully, sharpen last, then compare and preserve a reversible version.
This guide covers the current Photos workflows on Mac, iPhone, and iPad. Labels and feature availability can vary with your operating-system version, device, image type, language, and region.
As an Amazon Associate I earn from qualifying purchases.
Crashes, No Sound, or Screen Glitches?
Random freezes, missing sound and display glitches usually trace back to one bad driver. Find and replace yours safely.Free scan · under a minutePC Slower Than It Used to Be?
A free scan shows the junk files, broken settings and background clutter dragging Windows down - then fixes them in one click.Free scan · Windows 10 & 11What Apple Photos can—and cannot—do
Apple describes Photos on Mac as retaining the original so edits can be undone or reverted, making ordinary edits non-destructive: Apple Photos editing guide. It is well suited to phone photos, artwork documentation, family pictures, and other everyday work requiring cropping, straightening, exposure and color correction, filters, basic retouching, red-eye removal, Live Photo and video edits, and synchronized viewing.
Mac Photos documents the broadest built-in adjustment set, including white balance, selective color, curves, levels, vignette, sharpening, retouching, and third-party editing extensions. It is not a full substitute for every specialist workflow: layer compositing, advanced masking, typography, extensive RAW cataloging, complex object removal, and sophisticated local adjustments may require another application. Copying edits also has exceptions, and controls differ between platforms.
#1 Best Overall

- User-Friendly Portable Photo Printer for iPhone, Android & PC - Get beautiful and colourful memories with Liene 4x6 photo printer! After opening the entire package, you can find one cartridge + 20 sheets of photo paper (placed inside the machine packaging), as well as an additional box containing 80 sheets of photo paper (which includes two cartridges + 80 sheets of photo paper). Full package includes smartphone photo printer, Liene 4x6 photo printer papers (100 sheets), 3 colour cartridges, and fully sealed cassette to prevent dust. Minimalist and magnetic design for compact storage.
- Superior Quality 4x6 Photo Printer - Print photos like no other thanks to the thermal-dye sublimation tech adopted by the picture printer for iphone. The dyes deeply penetrate the paper for vibrant photo printing, and the laminated surface is resistant to water, scratches, fingerprints and fading. Clean the print head promptly if smudges are observed on printed photos during operation. Get Liene photo printers now for yourself and your loved ones, print your happy moments together and keep your love forever!
- Wi-Fi Photo Printer for Smartphone - The built-in hotspot of the photo printer makes it easy to print pictures from your phone, avoiding outside interference with a fast and stable connection. No other networks required! Simply connect your device to the independent instant photo printer 4x6 hotspot.
- Multiple Device Compatibility - Liene phone printer provides instant photo printing for up to 5 simultaneous connections. Share with family and friends or print from your different devices. No additional cables or Bluetooth required when printing photos with this picture printer. Note: Ensure the ink cartridge clicks into place before printing.
- Customize your Printing with the Liene App - Customize your photos with our specialized App! You can add a Square border, insert filters, enhance the contrast and brightness, check printing status, and more. You can even print your ID and Visa photos from home with this photo printer for iphone 4x6 prints.
Protect the original before you experiment
For normal edits, Photos keeps a path back to the original. Duplicate an image when you are testing a dramatic look, making an alternate crop, or performing significant retouching.
Duplicate on Mac
- Select the image in Photos.
- Choose Image > Duplicate 1 Photo, or press Command-D.
- Edit the duplicate.
Duplicating a Live Photo can retain its motion and sound or create a still-only duplicate, as documented in the Mac Photos guide. On iPhone and iPad, duplication is optional for routine corrections because Revert to Original is available, but it is useful when two distinct versions must coexist.
The Tool Desk
Outbyte Driver Updater FREEFix the driver behind crashes, sound loss and screen glitchesFind Drivers →Outbyte PC Repair FREEClear out junk files and repair common Windows errorsFree Scan →Pay special attention to crops. A crop changes how the image appears throughout Photos, including albums, slideshows, and projects. If you need an alternate aspect ratio without changing the existing presentation, duplicate first; see Apple’s crop and straighten instructions.
Open the editor on each platform
Mac
- Open Photos and double-click a photo or video.
- Click Edit in the toolbar, or select a thumbnail and press Return.
The current Mac user guide is framed around macOS Tahoe; menu names can change in later releases: Mac Photos User Guide.
iPhone
- Open Photos and open the photo or video.
- Tap Edit.
The current editing screen may show Styles, Portrait, Adjust, Crop, and, on supported configurations, Clean Up: iPhone Photos guide.
iPad
- Open Photos and select the image.
- Tap Edit.
iPad provides touch sliders and crop, filter, and adjustment tools, but it does not necessarily expose every Mac control: iPad crop and adjustment guide.
The professional Apple Photos workflow
1. Diagnose the image first
Before moving a slider, identify the actual problem: framing, a tilted horizon, excessive brightness, blocked shadows, a color cast, a distracting object, or softness. Increasing saturation or sharpening cannot repair a composition or exposure problem.
Rank #2
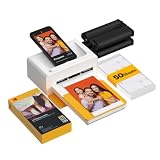
- Dock Photo Printer: The KODAK Dock Plus is a home photo printer that produces high-quality 4x6” prints directly from compatible smartphones. Featuring an integrated docking station, users can place their phone on the printer for better connection while simultaneously charging the device during printing.
- Genuine 4PASS dye sublimation printing: Each photo is produced in three color layers and finished with a clear protective lamination layer. In approximately 55 seconds, you receive a smooth, detailed print designed to resist fingerprints, water, and fading for long-lasting quality.
- Easy to Use: Print photos quickly without complicated setup or technical steps. Simply power on, connect wireless bluetooth, and start printing within seconds. The Dock Plus is built for straightforward operation, making it ideal for first time users and everyday photo printing.
- Home Printing Station: Designed for stable desktop use, this dock photo printer connects to a power outlet for consistent performance and larger 4x6” prints. Ideal for home printing, photo albums, framing, family events, and everyday picture printing.
- KODAK Photo Printer APP: Featuring integrated Bluetooth connectivity, this portable printer connects to compatible iOS and Android devices through the KODAK Photo Printer app. Edit, crop, and customize your photos before printing for creative results.
2. Crop and straighten
Composition comes first because a crop changes the visual balance you are judging. On Mac, click Crop, drag the frame, choose a preset such as Square, 4:5, or 16:9, or choose Custom. You can preserve the original ratio, use Auto, straighten with the slider, correct horizontal and vertical perspective, flip horizontally, or Option-click Flip for a vertical flip. Press C for quick access. Click Reset to remove crop and straighten changes. Details are in Apple’s Mac crop guide.
On iPhone or iPad, tap Edit > Crop, then drag the corners or pinch and use the available straighten and perspective controls. Keep important faces or artwork details away from the edge, avoid cutting through joints, and check resolution before an aggressive crop.
3. Try Enhance, then judge it
Use Apple’s automatic Enhance control as a starting point rather than a guaranteed finish. Compare it with the original and keep it only if it improves the photograph. It can flatten a deliberately dark scene, make window highlights harsh, exaggerate skin color, or emphasize night noise.
Recommended Free Tools
4. Correct exposure and dynamic range
Work from broad tonal changes to specific ones. A useful order is Brilliance or overall light, Exposure, Highlights, Shadows, Contrast, Brightness when needed, and finally Black Point.
- Raise shadows only until important detail appears; too much creates a gray, noisy image.
- Lower highlights enough to tame skies or lamps without turning them dull gray.
- Use contrast to restore separation, not to create harsh edges.
- Watch faces, bright windows, and the main subject before judging the whole frame.
- A brighter image is not automatically a better image; preserve a plausible direction of light.
5. Correct white balance and color
Find a neutral reference when possible, then correct warmth or coolness and any green or magenta cast. Recheck skin, snow, white paper, and recognizable colors before changing saturation. Apple lists white-balance and specific-color controls in the Mac editing tools.
Do not make every interior blue to remove warmth, add magenta without checking skin, or treat a deliberate sunset color as an error. Correct first; stylize second.
6. Apply filters or Photographic Styles lightly
On Mac, open Filters, choose a look, and reduce its intensity with the slider. Press F to reach filters quickly; see Apple’s filter guide. On iPhone and iPad, choose a filter and adjust its strength; selecting Original removes it.
Rank #3

- 2x3" Portable Photo Printer: The upgraded PP01 photo printer uses advanced inkjet technology. This portable photo printer produces vivid, full-color prints on premium sticky-backed photo paper that is smudge-proof, water-resistant, and tear-resistant. The Nelko mini photo printer is pocket-sized and weighs only 308g, making it ultra-portable for school, travel, and field trips. Each ink cartridge prints up to 80 full-color 2x3 photos on sticky-backed paper
- Easy Printing via Bluetooth: The PP01 mini photo printer is compatible with iOS and Android phones via Bluetooth. Simply download the Nelko app from Google Play or the App Store. Load the 2x3 photo paper with the smooth side facing down. Install the ink cartridge, connect via Bluetooth, and print directly using the Nelko app. A USB charging cable is included; the adapter is not included
- High Photo Quality: This mini photo printer uses advanced inkjet technology for clear, vibrant prints. This portable photo printer produces 600 DPI high-resolution images with precise colors, capturing fine details and realistic tones. Each photo comes with adhesive backing, perfect for scrapbooks and preserving your memories. Personalize every photo for holidays, birthdays, or daily events
- Powerful App: The Nelko 2x3" PP01 photo printer app lets you edit photos and offers a variety of frame designs, making it perfect for personalizing your photos for projects like scrapbooking or journaling. Download the Nelko app to create collages and customize photos with filters, graffiti, borders, stickers, text, AI image editing, and many other features. Edit photos on your phone, then send them to the Nelko app for instant printing in under 90 seconds
- Versatile Usage Scenarios: This portable photo printer is ideal for travel journals, party favors, and family gatherings. Students use it for planners and photo printing. Crafters use it for DIY projects, custom labels, and scrapbooking. It's a practical tool for bloggers, small businesses, and event photographers to create instant giveaways. Perfect for Mother's Day surprises and heartfelt moments with loved ones using Nelko sticky-backed photo paper.
For photos captured on iPhone 16 or later, Apple directs users toward Photographic Styles for customized tone and color rather than ordinary filters. This is capture- and device-dependent, not a control every older image receives: Mac guidance and iPad guidance. Use one restrained treatment across a series instead of stacking strong effects.
7. Refine individual colors
Selective color is preferable to global saturation when one hue is distracting or weak—for example, muting an intense green background or reducing excessive orange in skin. Make small changes and inspect for halos or disconnected colors.
8. Use levels and curves on Mac
Levels help set black and white points and restore a washed-out tonal range. Curves allow a gentle S-curve for contrast, lifted shadows for a faded treatment, or protected highlights. Start with tiny movements: large changes can crush detail, clip highlights, increase noise, or make skin harsh. Apple documents both tools in its Mac Photos guide.
9. Remove distractions and red-eye
Use Retouch for dust, sensor spots, tiny blemishes, and small background distractions. It is least reliable over complex edges, faces, hands, text, or repeating patterns. On supported Apple Intelligence devices and configurations, Clean Up can help remove distracting objects; language and regional availability vary, as Apple notes in its iPad documentation. Inspect the result at high zoom and disclose substantial removals in documentary work.
For flash portraits, use Red-Eye as a targeted correction. It does not replace broader lighting or portrait adjustments.
10. Adjust portrait depth when available
Supported Portrait images may offer background-blur or portrait-lighting controls. Check hair, glasses, fingers, and background edges, and avoid blur so strong that it looks artificial. These controls depend on how and with which device the image was captured.
11. Sharpen last
Apply sharpening after crop, exposure, and color work. Use it modestly for slight softness; excessive sharpening exaggerates noise, JPEG artifacts, skin texture, and halos. Apple lists sharpening among Mac adjustments: Mac editing tools.
Rank #4

- Instant Photo Printing: The KODAK Mini 2 Retro is a portable photo printer designed to turn smartphone pictures into high quality prints in seconds. Whether capturing family moments, travel highlights, journaling pages, or creative projects, this mini printer lets you print real photos anytime, anywhere.
- Genuine 4PASS dye sublimation printing: Each photo is produced in three color layers and finished with a clear protective lamination layer. In approximately 55 seconds, you receive a smooth, detailed print designed to resist fingerprints, water, and fading for long-lasting quality.
- Easy to Use: Print photos quickly without complicated setup or technical steps. Simply power on, connect wireless bluetooth, and start printing within seconds. The Mini 2 Retro is built for straightforward operation, making it ideal for first time users and everyday photo printing.
- Print Anytime, Anywhere: Small enough to fit in your hand, bag, or even a pocket, the Mini 2 Retro is built for on-the-go printing. Ideal for parties, trips, school projects, scrapbooks, and spontaneous moments where you want real prints without waiting.
- KODAK Photo Printer APP: Featuring integrated Bluetooth connectivity, this portable printer connects to compatible iOS and Android devices through the KODAK Photo Printer app. Edit, crop, and customize your photos before printing for creative results.
12. Compare before and after
On Mac, click and hold Compare or hold M; release to return to the edited view. On iPhone and iPad, tap the image while editing to see the original. If the correction is not clearly better at normal viewing size, undo it or reduce its strength.
Mac controls at a glance
| Control | Best use | Main risk |
|---|---|---|
| Exposure | Overall brightness | Clipped highlights |
| Highlights | Bright skies and lamps | Gray-looking highlights |
| Shadows | Recovering dark detail | Flat, noisy tones |
| Contrast | Tonal separation | Harshness |
| White Balance | Color casts | Unnatural skin |
| Selective Color | One hue at a time | Halos or artificial color |
| Curves | Precise tonal shaping | Crushed detail |
| Levels | Black and white points | Clipping |
| Vignette | Drawing attention inward | Obvious effect |
| Sharpen | Mild detail enhancement | Noise and halos |
| Retouch | Small spots or blemishes | Repeating textures |
| Clean Up | Supported object removal | Distorted edges or unavailable feature |
Copy a consistent look to other images
iPhone and iPad
- Open the edited item and tap More.
- Tap Copy Edits, review the edits, then tap Copy.
- Select one or more destination images.
- Tap More > Paste Edits.
Apple notes that Photos may automatically adjust pasted exposure and white balance to better match the destination. Instructions are in the iPhone guide and iPad guide.
Mac
- Select the edited item and choose Image > Copy Edits.
- Turn individual edits on or off, then click Copy.
- Select the target items and choose Image > Paste Edits.
Mac Photos does not copy retouch, red-eye, crop, or third-party extension settings: Apple’s copy-edits documentation. Batch pasting works best among images made in similar light, with similar exposure, camera, lens, subject, and white balance. Treat the pasted result as a starting point.
Undo, compare, and revert
Mac
- Undo the last change with Edit > Undo or Command-Z.
- Restore everything with Image > Revert to Original or the corresponding toolbar control.
iPhone and iPad
Open the edited item, tap Edit or More, then choose Revert to Original. Apple’s current instructions are here for iPhone and here for iPad.
Non-destructive editing is not a complete backup strategy. Keep iCloud Photos synchronized and maintain a separate backup for irreplaceable libraries.
Free tools Windows power users keep installed
One-click scans. No signup required.
iCloud Photos, formats, and annotations
With iCloud Photos enabled, edits can appear across your iPhone, iPad, Mac, and iCloud.com; setup, storage, connectivity, and synchronization state matter. Reverting or cropping a synchronized item affects the shared library, so wait for synchronization before deleting local copies. Apple’s cross-device overview is available at Photos User Guide.
RAW files generally tolerate more exposure and white-balance adjustment than processed JPEG or HEIF images, but format and camera support vary. Live Photos include motion and sound; duplicating one can preserve those components or produce a still. Video editing controls are not identical to still-photo controls.
Best Value

- Dual 4x6" & 3x3" Photo Printer Paper Tray Convenience: Seamlessly print both 6-inch standard photo paper and 3-inch sticky-backed paper with our innovative dual tray design. This compact phone photo printer for smartphone offers easy storage and quick access, making it perfect for diverse printing needs without taking up much space. Enjoy vibrant, high-quality prints every time.
- Fast Bluetooth Connectivity: Experience lightning-fast printing with our liene photo printer's Bluetooth connection, which pairs in just 13 seconds. Enjoy a seamless and efficient printing experience, perfect for capturing and sharing memories on the go without the hassle of cables or complex setups.
- Superior Quality Photo Printer 4x6 - Print photos like no other thanks to the thermal-dye sublimation tech adopted by the picture printer for iphone. The dyes deeply penetrate the paper for vibrant photo printing, and the laminated surface is resistant to water, scratches, fingerprints and fading. Get Liene photo printers now as amazing gifts for yourself and your loved ones, print your happy moments together and keep your love forever!
- Multiple Device Compatibility - Liene picture printer for iphone provides instant photo printing for up to mutiple simultaneous connections. Share with family and friends or print from your different devices. No additional cables required when printing photos with this phone printer.
- Customize your Printing with the Liene App - Customize your photos with our specialized App! You can add a Polaroid border, insert filters, enhance the contrast and brightness, check printing status, and more. You can even print your ID and Visa photos from home with this iphone photo printer for 4x6 & 3x3 prints.
Markup on iPhone and iPad adds text, shapes, stickers, signatures, or drawings. It is annotation, not retouching: iPhone Markup and Photos instructions.
Common problems and recovery
The image looks gray and flat
Shadows may be too high, contrast too low, black point too weak, or a matte curve too strong. Compare with the original, restore contrast or black point modestly, undo the latest change, or revert and restart.
Do these 3 things before closing this tab:
1Clear out junk files and repair common Windows errors2Scan for outdated or missing drivers - takes under a minute3Repair Windows errors before they cause bigger problemsSkin tones look orange or red
Reduce warmth and global saturation, then adjust the orange or red range if necessary. Judge the face at normal viewing size as well as zoomed in.
The sky is white
Lower highlights and exposure if detail exists. If the original clipped the sky, Photos cannot recover detail that was never recorded; revert rather than creating an unnatural gray sky.
Retouching leaves repeating texture
Undo the repair and use a smaller correction. Duplicate the image and try a specialist editor when the repair matters.
Pasted edits look wrong
Different light, exposure, white balance, or subject colors can make a copied look unsuitable. Paste only relevant light and color edits, disable unsuitable categories, and fine-tune the destination.
Quick wins for a faster PC:
Scan for outdated or missing drivers - takes under a minuteDriver Scan →Clear out junk files and repair common Windows errorsFree Scan →A promised control is missing
Check the device, operating-system version, capture mode, image type, language, and region. A Mac instruction will not necessarily map to iPhone or iPad, and Clean Up requires supported Apple Intelligence hardware and configuration.
When Apple Photos is enough—and when it is not
Stay with Photos for fast integrated corrections, cropping, color balancing, restrained styles, simple retouching, batch consistency, and an Apple-device library workflow. Consider a specialist editor when you need advanced masking, layers, complex object removal, extensive RAW cataloging, elaborate preset management, proofing or color-management controls, or more advanced noise reduction and sharpening.
Mac users can add third-party extensions inside Photos; Apple documents that option at Photos editing extensions. Choose an additional app for a specific capability, not simply because it has more sliders.
Quick Recap
A repeatable checklist
- Duplicate first for alternate crops or risky experiments.
- Crop and straighten.
- Use Enhance only as a test.
- Correct exposure, highlights, shadows, contrast, and black point.
- Neutralize white balance before styling.
- Use selective color, filters, or Photographic Styles with restraint.
- Retouch small distractions and inspect Clean Up results carefully.
- Sharpen last.
- Compare with the original at normal size.
- Copy edits only to genuinely similar images.
- Revert when the correction is not clearly better, and export deliberately.

Product prices and availability are accurate as of the date/time indicated and are subject to change. Any price and availability information displayed on Amazon at the time of purchase will apply.
What’s actually slowing this PC down?
Pick the symptom - the matching free tool is one click away.




