PC Slower Than It Used to Be?
The Tool Desk
Outbyte PC Repair FREERepair Windows errors before they cause bigger problemsFix Now →Outbyte Driver Updater FREEFix the driver behind crashes, sound loss and screen glitchesFind Drivers →Outbyte PC Repair · freeA free scan shows the junk files, broken settings and background clutter dragging Windows down - then fixes them in one click.
Run a Free PC Scan →ThatPainter is reader-supported. When you buy through links on our site, we may earn an affiliate commission. Learn More
Make pixel-art cookies by decorating a completely cooled, flat cookie with small blocks of royal icing arranged on a simple grid. Use thicker icing to outline the blocks and thinner icing to fill them; keep the palette small and let sections set when you need crisp color boundaries. This adapts standard royal-icing techniques to a pixel design—it is not a separately tested pixel-cookie recipe.
What you need
- Flat, fully baked cookies, cooled completely. A square cutter can help, but the cookie itself does not have to be square.
- Royal icing, divided into small bowls for coloring.
- Gel food coloring, added a little at a time.
- Piping bags with small tips or squeeze bottles. A toothpick or scribe can help nudge icing into corners; these tools are optional.
Royal icing can be used for both piped outlines and filled areas. Betty Crocker recommends piping bags for borders and squeeze bottles for thinned icing in its cookie-decorating guide. King Arthur Baking also describes piping tips and gel coloring in its royal-icing guide.
As an Amazon Associate I earn from qualifying purchases.
Free tools Windows power users keep installed
One-click scans. No signup required.
Plan a design that fits the cookie
Choose a small grid and a limited palette before you start piping. A simple icon, face, or geometric pattern is easier to keep legible than a design with many tiny color changes. Think of each icing block as one square in the grid, and leave enough room to pipe it cleanly on the cookie surface.
Prepare and color the icing
- Cool the cookies completely. Decorating a warm cookie can interfere with neat icing work. Betty Crocker advises making sure cookies are completely cooled before decorating.
- Divide the royal icing into bowls. Tint each portion with gel color a little at a time until it reaches the shade you want. Gel color gives you more control without adding as much liquid as liquid coloring may; Betty Crocker cautions that liquid coloring can make icing too runny.
- Set aside icing at different consistencies. Keep some thicker icing for outlines and fine details. Thin another portion gradually with a little water for filling larger areas. King Arthur describes detail icing as stiff, outline icing as toothpaste-like, and flooding icing as roughly the consistency of thick syrup.
- Cover icing you are not using. Royal icing dries quickly when exposed to air, so cover bowls between uses.
Pipe the pixel blocks
- Outline the design or individual squares. Use thicker icing to mark the edges of each color region. For a larger contiguous area, outline its perimeter first.
- Let outlines set before filling. Betty Crocker recommends allowing borders to set before adding flood icing. This helps the thinner icing stay within the intended area.
- Flood with thinner icing. Add water a little at a time until the icing flows like thick syrup, as King Arthur recommends. Fill the outlined blocks deliberately, stopping before the icing runs past its edges.
- Guide icing into corners. Use a toothpick or scribe to nudge the icing into square corners if needed.
- Work through the palette in sections. Fill one color block at a time. If neighboring colors need a clear boundary, allow one section to set before piping directly beside it. This is a practical adaptation of standard outline-and-flood methods, not a separately tested pixel-cookie protocol.
Dry and store the cookies
Leave the decorated cookies undisturbed until the icing is completely dry before stacking or storing them. Betty Crocker likewise advises letting the icing dry completely before storage.
#1 Best Overall

- FUNNY 3D NOVELTY DESIGNS - Cartoon-style 3D plunger stamps emboss cute, vivid cookies fast; perfect for fun baking, kitchen humor, and Instagram/social media photo props.
- SAFE FOOD-GRADE PLASTIC - Durable food-grade plastic with smooth rounded edges; lightweight and kid-friendly baking tools for children, family bonding, and beginner baking.
- VERSATILE DIY CRAFTS - Use as cookie cutters and stamps for dough, fondant, pastry, pie crust; also for cheese, sandwiches, soft fruits, polymer clay, play dough, DIY decor.
- EASY PRESS-AND-STAMP - Press into dough, push plunger to emboss, release cleanly for shaped biscuits; no special skills, beginner-friendly, quick cleanup for stress-free baking.
- PERFECT PARTY FAVORS & GIFTS - Great for birthday party supplies, holiday desserts, goodie bag fillers, and novelty presents; fun gift for kids, bakers, DIY lovers, and decor.
Handle dough safely
Do not taste raw cookie dough or batter. The CDC warns that raw flour can carry germs and that raw eggs can carry Salmonella. Bake dough according to its recipe or package directions, and wash hands and surfaces after handling raw flour or eggs: CDC guidance on raw dough.
Quick Recap
Rank #4
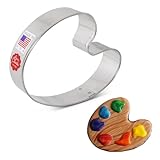
- Bake Art‑themed Sugar Cookies with Ease: Paint your world, and your treats, with this versatile paint‑palette cookie cutter. Perfect for an artist party, PYO (Paint‑Your‑Own) decorating events, or even creative golf green themed birthday parties.
- Made in USA and Family Owned for over 35 Years: Ann Clark is America’s largest cookie cutter maker. Ann and her family have made over 50 million cookie cutters in their Rutland, Vermont, factory.
- Perfect Size: Paint palette cookie cutter measures a small 3-1/2 inches. Made from certified food-safe American steel to cut cleanly through dough, with rolled upper edge for gripping.
- Experience the Joy of Baking with Family! We’re here to make it easy with recipes, tips, and how-to videos on our Amazon store. (We celebrate the experiences of real bakers and cookie decorators, and use AI to create some of our advertizing visuals.)
- You’ll Love Baking Cookies: Decorated with your favorite colors using royal icing, frosting, or sprinkles, your cookies will look great, taste great, and be fun to make.
Rank #3

- EASY PUSH DESIGN - The wide push tab base makes it easy to press down with less stress on your hands.
- 3D PRINTED IN THE USA FROM IMPORTED MATERIALS - Our cutters are printed in our small family-run shop in Lincoln, Nebraska using plastic filament sourced internationally.
- PLASTIC MATERIAL - For use with unbaked dough only. Hand wash with warm water and mild soap. Not dishwasher safe.
- FOR ANY BAKING OCCASION - Use it for themed parties, bake sales, baby showers, holiday cookie boxes, and seasonal baking.
- A GIFT FOR BAKERS - A practical and fun gift for home bakers, party hosts, and cookie decorating enthusiasts. Works for birthdays, holidays, bake sales, and any themed celebration.
Rank #2

- Pixel Barbell Dumbbell Cookie Cutter – Perfect for fitness enthusiasts, gamers, and unique baking creations.
- Fun Pixelated Design – Brings a cool, retro gaming look to cookies, fondant, and craft projects.
- Food-Safe & Durable – Made from high-quality, food-safe plastic with a sturdy 0.6" thickness.
- Versatile Use – Great for baking, cake decorating, fondant, and even clay crafting.
- Easy to Clean – Hand wash only, not dishwasher safe, ensuring long-lasting use.

Product prices and availability are accurate as of the date/time indicated and are subject to change. Any price and availability information displayed on Amazon at the time of purchase will apply.
Recommended Free Tools




