Windows Errors? Fix Them Before They Spread
Repair common Windows errors and clear accumulated junk for a smoother, more stable PC - no reinstall needed.Free scan · no reinstallCrashes, No Sound, or Screen Glitches?
Random freezes, missing sound and display glitches usually trace back to one bad driver. Find and replace yours safely.Free scan · under a minuteThatPainter is reader-supported. When you buy through links on our site, we may earn an affiliate commission. Learn More
Epoxy is a great coating option as a final layer to finish off a surface, so it is no wonder that it is becoming increasingly popular with more and more people choosing it over other alternatives. But would epoxy paint be good for your basement floor?
As an Amazon Associate I earn from qualifying purchases.
The answer is yes! In fact, epoxy paint can offer many benefits compared to other floor coating materials, and it is actually especially suited to basement floors due to its characteristics! We absolutely recommend that you use epoxy paint for your basement floor, and more and more people are doing as such and reaping the advantages.

Here are a few of the main pros for painting your basement floor with epoxy:
- Durability and resistance:
One of the main reasons why epoxy paint is an excellent option is that it is incredibly durable and long-lasting. A good coating of high-quality epoxy paint means you won’t have to worry about the floor peeling or getting damaged by wear and tear, at least not any time soon!
#1 Best Overall
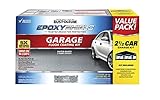
- 2-PART EPOXY COATING: Water-based epoxy kit finishes concrete garage floors in good, sound condition with a gloss, color-flecked finish
- READY FOR VEHICLES IN 3 DAYS: Light foot traffic ready in 12-16 hours, normal use in 24-48 hours, full vehicle traffic in 3 days
- COMPLETE KIT INCLUDED: Burst pouch coating, decorative chips and concrete etch are included for a full application
- EASY ROLLER APPLICATION: Apply with a synthetic nap roller in 4x4 foot sections and scatter chips onto the wet coating as you go
- OPTIONAL CLEAR TOPCOAT AVAILABLE: Pair with EpoxyShield Clear Finish Coating Kit for additional protection and shine
This is especially good for basement floors because basements have slightly harsher conditions than the rest of the house, and they usually aren’t as well taken care of, so the floor needs to be tougher in order to endure!
- Easy maintenance:
Epoxy coatings are completely impermeable and water-proof, and the smooth surface they provide makes it super easy to clean up any spillage, stains, or dirt. You can very easily sweep or vacuum an epoxy surface, and it takes very little effort to keep it in top condition. So another huge reason why epoxy paint is so favored as a floor coating is that it is super easy to maintain and looks its best with minimal effort on your part.
Rank #2
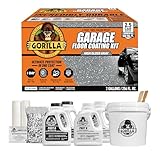
- Ultimate Protection in One Coat: 2-part 100% solids epoxy delivers, incredibly durable, exceptional resistance to chemicals, abrasions, salt, oil, gas, and hot tire peel-up that is ideal for garages, basements, workshops, & more.
- High Gloss Finish: Achieve a showroom-quality finish that is crack resistant, peel proof, low VOC, while enhancing the appearance and performance.
- Covers up to 550 sq. ft.: Includes two gallons of premium material – enough for a thick, long-lasting coat on a standard 2.5-car garage floor.
- Drive on After 1 Day: Quick curing epoxy resin and hardener allows you to use your space 24 hours after application.
- 12 Pc DIY Kit: Epoxy resin, epoxy hardener, decorative gray blend flakes, concrete etch for proper surface prep, mixing buckets, stir sticks, roller covers, decorative and easy-to-follow pictured with printed instructions as well as how-to video guides for a seamless application.
In a basement, where you likely won’t spend much time cleaning (as you will be prioritizing the rest of the house), an easy-to-maintain floor is essential so epoxy is definitely a good choice!
Free tools Windows power users keep installed
One-click scans. No signup required.
- Protection from moisture:
One of the biggest problems that basements present is dampness. As they are underneath the house, and closer to the ground below, they tend to be colder and a lot more moisture seeps in through the floor, filling the room. If they aren’t well maintained, this can lead to problems with mold and similar!
Rank #3

- 2-PART EPOXY COATING: Water-based epoxy kit finishes concrete garage floors in good, sound condition with a gloss, color-flecked finish
- READY FOR VEHICLES IN 3 DAYS: Light foot traffic ready in 12-16 hours, normal use in 24-48 hours, full vehicle traffic in 3 days
- COMPLETE KIT INCLUDED: Burst pouch coating, decorative chips and concrete etch are included for a full application
- EASY ROLLER APPLICATION: Apply with a synthetic nap roller in 4x4 foot sections and scatter chips onto the wet coating as you go
- OPTIONAL CLEAR TOPCOAT AVAILABLE: Pair with EpoxyShield Clear Finish Coating Kit for additional protection and shine
An epoxy-painted floor, however, is completely waterproof and impermeable, and this means that it will stop dampness and moisture right in their tracks, solving the issue outright! So basically, using epoxy on your basement floor can make your basement a lot more habitable and a lot easier to keep in safe and hygienic conditions.
- It looks good!
We can’t forget about the appearance and aesthetics of the materials that you choose to use, because after all, even the floor of your basement should be able to look good! Luckily, epoxy paint is incredibly varied and is available in many different types of style and in many different colors, so you’re guaranteed to get your floor looking the way you want it, and you can get as creative as you want!
Rank #4

- HIGH GLOSS BLACK FINISH: Self-leveling polycuramine coating creates a durable, showroom-quality garage floor finish
- RESISTS CHEMICALS AND HOT TIRES: Excellent resistance to salt, oil, gasoline and other harsh chemicals
- COMPLETE KIT INCLUDED: Burst pouch coating, foam roller, decorative chips and concrete etch are included
- READY FOR VEHICLES IN 36 HOURS: Foot traffic ready in 8-10 hours; full vehicle traffic ready in 24-36 hours
- LOW ODOR, INDOOR APPLICATION: Formulated without VOC-containing solvent and offers a 7-day recoat window without sanding
Epoxy paint can come in solid colors, or in shimmery shiny colors, or in metallic colors, or with decorative flakes, and many many more! And as the epoxy is super durable, these appealing styles will all be tough and long-lasting.
Quick wins for a faster PC:
Clear out junk files and repair common Windows errorsFree Scan →Scan for outdated or missing drivers - takes under a minuteDriver Scan →
How do you epoxy paint a basement floor?
If you do choose to paint your basement floor with epoxy paint, which is an excellent idea full of benefits, then the next step is to figure out how.
Best Value
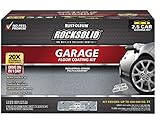
- HIGH GLOSS GRAY FINISH: Self-leveling polycuramine coating creates a durable, showroom-quality garage floor finish
- RESISTS CHEMICALS AND HOT TIRES: Excellent resistance to salt, oil, gasoline and other harsh chemicals
- COMPLETE KIT INCLUDED: Burst pouch coating, foam roller, decorative chips and concrete etch are included
- READY FOR VEHICLES IN 36 HOURS: Foot traffic ready in 8-10 hours; full vehicle traffic ready in 24-36 hours
- LOW ODOR, INDOOR APPLICATION: Formulated without VOC-containing solvent and offers a 7-day recoat window without sanding
You could, of course, simply hire a professional and let them do the painting, in which case you don’t really have to worry about the process at all. But…that could get pricey! Truth is, painting your basement floor with epoxy paint isn’t that hard at all, so we highly recommend that you do it yourself!
And to help you out, we’ll tell you exactly what you need and what steps to follow!
What you will need:
- Epoxy paint primer
- Epoxy paint of your choosing
- A paintbrush
- A foam roller
- Some painter’s tape
- A concrete patch kit (if needed)
- Some basic cleaning materials (such as a broom, a mop, degreaser, and a vacuum)
Step-by-Step guide on how to epoxy paint your basement floor:
- Start by preparing your basement floor. Remove furniture and items, and make sure it’s warm enough. Most epoxy paint requires it to be at least 50 degrees Fahrenheit, or else the paint won’t stick to the floor properly.
- Clean the floor. It is very important that the floor has been thoroughly cleaned beforehand so that no dirt is trapped under the paint.
- If the floor needs repairing in any place, do that before painting!
- Protect the areas and edges you don’t want to paint over by using the painter’s tape.
- Apply the epoxy primer over the entire surface, then let it dry for 24 hours.
- Apply the epoxy paint. You can start by painting the edges with a paintbrush, and then use a roller for the rest of the surface so that the job doesn’t take as long. Make sure you paint over the entire floor in an even way. Then let it dry for 24 hours.
- Optional, but recommended: apply a second layer of epoxy paint! Then let it dry for another 24 hours, and the floor should be done!
What is the best epoxy paint for a basement floor?
There are many different types of epoxy paint that are suitable for painting your basement floor. And although we could start making lists for the best options, it truly just depends on your basement, and on the kind of finish that you’re aiming for.
What’s important is that you make sure the epoxy paint is as high quality as possible and that you choose a color and style that you are happy with, as it is going to last quite some time! You should also compare different brands and stores so that you can get the paint at the best possible price while ensuring it is also the best possible choice of paint for you.
Quick Recap

Product prices and availability are accurate as of the date/time indicated and are subject to change. Any price and availability information displayed on Amazon at the time of purchase will apply.




