Outdated Drivers Are Slowing You Down
What’s actually slowing this PC down?
Pick the symptom - the matching free tool is one click away.
One free scan finds every outdated or missing driver and matches the right update for your exact hardware.Free scan · exact hardware match
PC Slower Than It Used to Be?
A free scan shows the junk files, broken settings and background clutter dragging Windows down - then fixes them in one click.Free scan · Windows 10 & 11
ThatPainter is reader-supported. When you buy through links on our site, we may earn an affiliate commission. Learn More
Once a Nine-Patch block or quilt top is assembled, you can quilt it in two especially effective ways: straight-line diagonal crosshatching for a crisp, structured finish, or curved orange-peel quilting for an interlocking, rounded texture. Both designs can be stitched on one block or extended across an entire Nine-Patch quilt top.
The important distinction is that these are quilting designs, not piecing instructions. In either case, mark the design first, build the quilt sandwich, install a compatible walking foot, and test your thread, needle, tension, and stitch length on a scrap sandwich before stitching the finished quilt.
The Tool Desk
Outbyte PC Repair FREERepair Windows errors before they cause bigger problemsFix Now →Outbyte Driver Updater FREEFix the driver behind crashes, sound loss and screen glitchesFind Drivers →Before you begin: supplies and machine setup
These two motifs use the same basic machine-quilting setup. Gather:
- A completed Nine-Patch block or quilt top
- Batting and backing
- A water-soluble or water-erasable quilting marker, or chalk
- A 4-by-8-inch ruler for marking short straight sections
- A jar lid, cup, saucer, or large coin to use as a curve template for orange peel
- A walking foot compatible with your sewing machine
- A new machine needle
- 50-weight, 100% cotton thread for the needle and bobbin
If you are still preparing or squaring the block, a quilting ruler, rotary cutter, and self-healing cutting mat can help with accurate cutting. They are preparation tools, however; they do not replace the walking foot, needle, thread, or marking tool required for the quilting itself.
#1 Best Overall
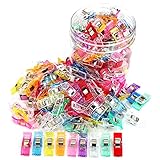
- high-quality super transparent AS material
- Assorted color with clear jar
- Clip size: 2.7cm (1.06") x 1cm (0.39") x 1.1cm (0.43") (LxWxH). The maximum opening of the clip: 0.9cm (0.35").
- CLips have 3 marking lines, so you can measure the distance between the clip and the edge of the fabric.
- Also can use on books,clothes etc
For 50-weight cotton thread, an 80/12 Microtex, Universal, Quilting, or Denim needle is a commonly recommended starting point. Needle choice can still vary with the fabric, batting, machine, and thread, so treat it as a test setting rather than a guarantee.
Compatibility note: walking feet are not universally interchangeable. Check the foot’s attachment style and compatibility with your specific machine model before buying or installing one. A machine manufacturer may list several different walking or quilting feet for different models.
For a convenient starting point, see a walking foot for sewing machine, but verify compatibility with your machine before ordering.
Likewise, choose a water-soluble quilting marker or chalk that is appropriate for your fabric. Test it on a scrap of the same fabric, allow it to dry if the product instructions require that, and follow the manufacturer’s removal directions. Some marking products may become permanent or fail to disappear if exposed to heat, so do not iron over an untested mark.
You can also compare 50wt cotton quilting thread and 80/12 quilting needles as a starting setup. The exact brand is less important here than using the specified weight and testing the combination on your own quilt sandwich.
Prepare the quilt sandwich
- Mark the quilting design on the completed quilt top before layering it.
- Place the marked top over the batting and backing to create the quilt sandwich.
- Baste the layers securely using your preferred basting method.
- Install the compatible walking foot and a new needle.
- Thread both needle and bobbin with 50-weight, 100% cotton thread.
- Make a test sandwich from similar fabrics and batting. Check stitch length, tension, thread appearance, turning or pivoting, and the amount of drag under the foot.
When quilting a full-size quilt, mark and baste in manageable sections if necessary. The marking and stitching paths below are demonstrated conceptually on one block, but the lines can continue across adjoining blocks and seams.
What’s actually slowing this PC down?
Pick the symptom - the matching free tool is one click away.
Rank #2

- Premium Thick Acrylic Construction Made of high grade transparent acrylic material, this quilting ruler set features a sturdy, wear resistant build that resists cracking, warping and bending for long term daily use. The clear design offers full visibility of fabric underneath, while smooth polished edges protect hands and fabric from snags or damage, ideal for frequent sewing and quilting projects.
- Precise Clear and Crisp Green Markings Equipped with sharp, fade resistant green measurement markings and clear grid lines, including 1/8 inch incremental scales, 90 degree right angle and 45 degree diagonal guides for ultra precise cutting and measuring. The high contrast green scale stands out clearly on both light and dark fabrics, eliminating reading errors and ensuring flawless piecing, trimming and block squaring every time.
- Complete Multi Size Square Set Includes 4 essential square quilting rulers in 3.5", 5", 6.5" and 10.5" sizes, covering all daily quilting, sewing and fabric crafting needs. From small patchwork details and trimming tiny blocks to large fabric cutting and full quilt block finishing, this all in one set meets the demands of beginners, hobbyists and professional quilters alike.
- User Friendly and Stable Design Lightweight yet durable structure ensures easy handling and maneuverability during crafting. The flat balanced design stays securely in place when cutting with rotary cutters, no unwanted shifting or sliding. Each ruler is easy to use for all users, with easy to read numbering and clear measurement guides for hassle free operation.
- Multi Purpose Sewing and Craft Tool This versatile acrylic quilting ruler set is perfect for quilting, sewing, fabric cutting, patchwork, scrapbooking and other DIY craft projects. Compatible with all standard rotary cutters and cutting mats, it is a must have essential tool for sewing rooms, craft studios and classrooms. A practical and thoughtful gift for sewing enthusiasts, quilters and craft lovers.
Method 1: straight-line diagonal crosshatching
Crosshatching is made from diagonal lines that intersect across the Nine-Patch. The result is linear and geometric, so it naturally reinforces the block’s grid.
Mark the diagonal lines
Use a water-soluble marker or chalk to draw the diagonal paths. A 4-by-8-inch ruler is useful for marking a short section at a time. Short sections let you adjust as you go if the block is slightly out of square rather than committing to a long line that exposes every measurement discrepancy.
On a single block, mark the diagonal lines so they cross one another and form the crosshatch. On a full quilt top, extend each path from one edge of the quilt to the opposite edge instead of restarting the design at every individual Nine-Patch block. Continuous lines generally produce a more unified overall texture.
Stitch the crosshatch
- Begin with the longest diagonal line, generally the one near the center of the block or quilt top.
- Stitch along the marked line. Use the walking foot to help feed the quilt layers evenly.
- When the path reaches a corner or requires a change of direction, pivot as indicated by the marked design.
- Pivot 45 degrees and continue along the next diagonal path.
- Pivot 90 degrees for the next path, then pivot another 45 degrees as needed to complete the remaining diagonals.
- Continue until the intersecting diagonal lines form the complete crosshatch.
Keep the quilt supported on the table or in your lap so its weight does not pull against the needle. Stop with the needle down whenever you need to reposition the quilt. If edges or areas of the sandwich remain unsecured, baste them before continuing.
What crosshatching does visually
Choose this design when you want the quilting to emphasize the Nine-Patch’s straight seams, squares, and orderly geometry. That preference is a design judgment rather than a claim that crosshatching performs better than orange peel: its advantage is the visual relationship between the straight intersecting lines and the block structure.
Method 2: curved orange-peel quilting
Orange-peel quilting uses repeated scalloped or curved lines to create an interlocking circle effect. The curved texture gives the square Nine-Patch a softer visual counterpoint.
Rank #3

- GREAT FOR ANY FABRIC - Trade in dusty tailors chalk or messy sewing chalk for these Heat Erasable Pens for fabric. Ideal for quilting supplies clearance, these fabric pens glide smoothly over any sewing fabric for clear, easy-to-see lines.
- 3000 FEET GUARANTEE - Each pen comes with 2 refills. They cover up to 3000ft in total, so ditch old sewing stuff for this sewing gadgets. They’re a must for sewing tools, quilting notions, and sewing machine accessories.
- IRON-AWAY CONVENIENCE - Simply apply heat from your iron, and the markings vanish in seconds. Perfect for busy sewists who want more time creating and less time scrubbing lines away.
- NO GHOST MARKS - These heat erasable pens for fabric disappear cleanly, leaving your sewing fabric pristine with zero residue. An ideal alternative to messy fabric chalk / fabric pencil or water soluble fabric marker.
- ESSENTIAL SEWING NOTIONS - Upgrade your sewing supplies and sewing accessories with this heat erasable pen set. Perfect for sewing patterns for beginners. Great as a embroidery pen or disappearing ink pen.
Mark the curves
Use a water-soluble marker or chalk to mark the curved paths. A jar lid, cup, saucer, or large coin can serve as a template. Choose the template according to the curve depth you want between seam intersections; a smaller template creates a tighter curve, while a larger one creates a broader sweep.
Test the template on a paper drawing or scrap block first. The curve should meet the intended seam intersections consistently without forcing the fabric out of shape. On a full quilt, continue the curved paths from one edge to the other so the motif flows across multiple Nine-Patch blocks rather than appearing as separate designs inside each square.
Windows Errors? Fix Them Before They Spread
Repair common Windows errors and clear accumulated junk for a smoother, more stable PC - no reinstall needed.Free scan · no reinstallOutdated Drivers Are Slowing You Down
One free scan finds every outdated or missing driver and matches the right update for your exact hardware.Free scan · exact hardware matchStitch the orange peel
- Start at the center of one edge of the block or quilt section.
- Stitch the marked scallops across the block to the opposite edge.
- Pivot 360 degrees and follow the return path back toward the first edge, creating the interlocking curve.
- Pivot 90 degrees and work across the square in the same way.
- Continue with repeated 90-degree turns and edge-to-edge scalloped paths until the orange-peel motif is complete.
At a pivot, stop with the needle down, lift the presser foot, rotate the quilt carefully, lower the foot, and resume stitching. The exact amount of turning depends on the marked path. Avoid dragging or twisting the sandwich while the needle is still engaged in the fabric.
If you are quilting a full quilt top, maintain the same curve template and direction as you move from section to section. Consistency matters more than making every curve mathematically perfect, especially when the pieced blocks are not identical in size.
What orange peel does visually
Choose orange peel when you want rounded movement and an interlocking texture rather than another layer of straight lines. The curves soften the Nine-Patch’s square geometry, but they require more marking and more frequent turning than the diagonal crosshatch.
Crosshatch or orange peel?
| Consideration | Diagonal crosshatch | Orange peel |
|---|---|---|
| Overall look | Crisp, linear, geometric | Rounded, flowing, interlocking |
| Relationship to Nine-Patch seams | Echoes and reinforces the square grid | Contrasts with the square grid |
| Marking | Short straight sections with a ruler | Repeated curves using a template |
| Machine movement | Long straight runs and angled pivots | Scalloped paths and frequent turns |
| Choose it when | You want structure and visual order | You want softer movement and rounded texture |
Neither design is universally better. Crosshatching is the more direct choice for a strongly graphic Nine-Patch. Orange peel is the better visual match when you want the quilting to interrupt or soften the block’s straight-line appearance. For either one, the test sandwich should determine whether your machine setup produces the result you want.
Free tools Windows power users keep installed
One-click scans. No signup required.
Rank #4

- Upgraded Multifunctional Design: Our magnetic seam guide features an innovative polygonal design that excels in edge binding, accurate positioning, edge roll prevention, and crease pressing. Say goodbye to the pitfalls of traditional sewing aids—this guide stays true, even when working with thick fabrics
- Effortless Operation: Simply place the seam guide on the needle plate of your sewing machine and let your fabric slide along it. The guide helps maintain a consistent seam width on every project. Need adjustments? Just lift and reposition the guide with ease
- Secure, Robust Construction: Made from high-strength ABS resin and featuring a powerful magnet, this seam guide is built to last and resist breakage. Its strong magnetic hold ensures the guide remains securely in place, providing edge protection and anti-curling performance for stable, accurate stitching
- Universal Compatibility: Designed to work with most quilting and sewing machine brands, this magnetic seam guide is perfect for beginners, amateurs, and professionals alike. (For machines without a metal plate behind the presser foot, a sticky magnet square may be used to keep the guide firmly in place)
- Ideal Sewing Gift – 3-in-1 Set: Each package contains three beautifully packaged magnetic seam guides in orange, pink, and green. This safe, stable, and versatile accessory makes a perfect gift for sewing enthusiasts on special occasions such as Thanksgiving, Mother's Day, Christmas, Easter, New Year's Day, Valentine's Day, birthdays, and more
Troubleshooting before and during quilting
The marker is faint, smears, or will not disappear
Use a different marking method only after testing it on the same fabric. Markers and chalk behave differently on light, dark, tightly woven, and textured fabrics. Follow the product’s removal instructions, and avoid ironing until all marks have been removed or you have confirmed that heat is safe for that product.
The lines do not meet at the seams
Do not force the needle path to match an inaccurate mark. Stop, assess the seam and block alignment, and adjust the next short section. This is one reason to mark with a small ruler rather than drawing the entire block in one uninterrupted operation. On a full quilt, prioritize a smooth, coherent path over making every line pass through a slightly irregular seam intersection.
The fabric puckers or the stitches look uneven
Recheck basting, thread tension, stitch length, needle condition, and the way the quilt is supported. Test one change at a time on the sample sandwich. A walking foot helps feed the layers together, but it cannot correct loose basting, an unsuitable needle, excessive quilt drag, or a machine setting that has not been tested.
The walking foot does not fit
Stop rather than adapting an incompatible foot by force. Confirm the machine model, shank type, attachment method, and any manufacturer-specific requirements. Accessory names are not enough to establish universal compatibility.
The quilt edges remain unstitched
Baste any remaining unstitched edges and finish those areas after the main paths are complete. Secure edge sections before they shift or fold under the machine foot.
A practical decision checklist
- Pick crosshatch if you want straight lines, pronounced geometry, and a design that relates closely to the Nine-Patch seams.
- Pick orange peel if you want curves, interlocking circles, and a softer contrast to the block’s square construction.
- Use the ruler for short, adjustable diagonal marks.
- Use a household round object as a curve template, provided its size creates the curve depth you want.
- Extend paths edge to edge when quilting a full quilt top rather than treating every block as an isolated square.
- Test before quilting with the actual or closely matched fabric, batting, backing, thread, needle, and machine settings.
Source and product notes
The two quilting sequences are based on instructions from the American Patchwork & Quilting editors, published February 8, 2018. The source demonstrates the designs on a block while noting that the paths can be extended across a full quilt top. Product guidance for water-erasable marking tools emphasizes testing on the same fabric and observing removal instructions. Thread guidance supports 50-weight cotton for machine quilting and lists several suitable starting needle types.
Best Value
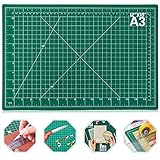
- 【SEWING CUTTING MAT】Aneuzs self-healing cutting mat protects your work surface. Compatible with rotary cutters and straight blades, won't hurt the cutter blade and keep the blade sharpness. Ideal for artist, crafters, quilters, engraver and hobbyists
- 【SELF HEALING CUTTING MAT】Made of 5-layer PVC material, the white hardness PVC in the middle help to prevent cutting through. Special finish reseals surface cuts, providing a continually smooth surface for all cutting projects
- 【ROTARY MAT SIZE】Rotary cutting mat measures approx.12 x 18 inches (A3 size), durable and reusable. Perfect for small, medium and large craft and sewing projects
- 【DOUBLE SIDE CRAFT CUTTING MAT】This double side sewing mat with measurements is printed clearly with both inches, metric grid lines and angles help to cut precisely
- 【MULTIPURPOSE SEWING BOARD CUTTING MAT】Great for sewing, crafts, model, quilting, fabric, scrapbooking project cutting projects
Product availability, prices, retailer listings, and machine-accessory compatibility can change. Treat those details as current only after checking the manufacturer or retailer listing for your particular machine and materials.
Frequently Asked Questions
Can I use these designs on an entire Nine-Patch quilt instead of one block?
Yes. Extend the marked straight or curved paths from one edge of the quilt top to the other rather than restarting at each block. Work in manageable sections and keep the quilt sandwich securely basted.
Do these 3 things before closing this tab:
1Clear out junk files and repair common Windows errors2Fix the driver behind crashes, sound loss and screen glitches3Repair Windows errors before they cause bigger problemsDo I need a walking foot for both quilting designs?
A walking foot is part of the recommended setup for both crosshatch and orange-peel quilting because it helps feed the quilt layers evenly. Confirm that the foot is compatible with your particular sewing-machine model.
What should I test before quilting the finished quilt?
Test the actual or closely matched fabric, batting, backing, thread, needle, stitch length, tension, marking method, and machine-foot setup on a small quilt sandwich. This is the safest way to identify puckering, poor tension, or an unsuitable needle.
Can I use any fabric marker for the quilting lines?
Use a product intended for the fabric and test it on a scrap of the same material first. Follow its removal instructions and do not iron over untested marks, since some marks may become difficult or impossible to remove with heat.
The Bottom Line
Use diagonal crosshatching for a crisp quilting design that supports the Nine-Patch grid, or choose orange peel for rounded, interlocking movement. Mark carefully, extend the paths across the quilt when appropriate, use a compatible walking foot and fresh needle, and test the complete setup on a quilt-sandwich sample before stitching the project.
Quick Recap

Product prices and availability are accurate as of the date/time indicated and are subject to change. Any price and availability information displayed on Amazon at the time of purchase will apply.




