What’s actually slowing this PC down?
Recommended Free Tools
Pick the symptom - the matching free tool is one click away.
ThatPainter is reader-supported. When you buy through links on our site, we may earn an affiliate commission. Learn More
As an Amazon Associate I earn from qualifying purchases.

We all know how expensive car repairs and paint jobs can be. So, that only makes someone else accidentally damaging your car even more painful. Even more so when your insurance doesn’t cover that kind of damage.
How would it make you feel if we told you the average American paint job cost close to $2500? Most people can’t afford to pay that kind of money, especially when it’s not going to be covered by their insurance.
#1 Best Overall
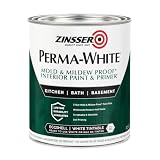
- Self-Priming formula - requires no sanding
- Mold & Mildew-Proof paint film - guaranteed for 5 years
- Resists dirt and moisture on film coating
- Finish is washable and scrubbable with soap and water
- Product contains a mildewcide to prevent the growth of mold and mildew on the paint film only
So, what are your options if you can’t afford to have your car professionally repainted?
Well, you could do it yourself.
If you don’t have $2500 to spend, you might find that it’s better to invest one of your precious Saturday afternoons and get the job done yourself for a fraction of the price.
Don’t think you can do it? By the time you have finished reading this article, we’re sure you will have changed your mind on that one.
Why would you want to paint your bumper yourself?
Bumpers are the trickiest part of the car to keep looking good. It would shock us if car companies actually made those paint jobs to last.
Our bumpers can fall foul of many things on the roar from a sly curb during a parallel park in the city to an errant bramble while you’re steaming down a country road.
So, why would you want to paint your bumper yourself?
Let’s be honest the main reason you’re looking into painting your own bumper is that you want to save some money. And there’s absolutely nothing wrong with that. Not all of us have $2500 in our pocket to burn on a paint job.
Some of you may want to do this job yourself so that you can learn a new skill. Some of you might have an icon design in mind that no car painter but you could hope to capture.
Whatever your reason, we’re here to give you the confidence to get this job done yourself.
Before we dive into how to paint your own bumper, let’s take a quick look at how you could financially benefit from doing so.
Overall costs – professional vs DIY
The average cost of having your car professionally painted is around $2500. Having your bumper painted can account for between 15-20% of that cost.
Do these 3 things before closing this tab:
1Clear out junk files and repair common Windows errors2Scan for outdated or missing drivers - takes under a minute3Repair Windows errors before they cause bigger problemsRank #2

- PAINT + PRIMER IN ONE: Evolve’s paint-and-primer formula helps you get great coverage from the start, sealing your surface and reducing the extra work of multiple coats.
- AVAILABLE IN MULTIPLE SHEENS, COLORS & SIZES: Choose from a curated palette of designer colors in Flat, Eggshell, Satin, and Semi-Gloss sheens to match any style, room, or project. Available in 1-Gallons & 5-Gallons.
- EGGSHELL SHEEN – Soft, Velvety Glow: Offers a gentle sheen that balances elegance with durability. Ideal for moderate-traffic areas like dining rooms, hallways, and family rooms. Easy to clean without compromising the finish.
- STAIN & SCRUB RESISTANT: Built to last in real spaces, Evolve helps resist marks, scuffs, and water spotting, so your home continues to look polished and well-maintained.
- DESIGNED FOR MOISTURE-PRONE AREAS: Formulated to perform well in bathrooms, kitchens, entryways, laundry rooms, and other high-humidity spaces.
When trying to estimate a total cost of a job you have to take a few things into account. You have to consider the cost of the supplies, the man-hours (which count as skilled labor), the prep work, the painting time, and the finish. The better the reputation of the shop the more they will be able to charge you.
Taking all of this into account having your bumper painted professionally can cost anywhere from $200-$400.
How does this compare to doing the job yourself?
Well, most guides online will tell you that when you are painting your bumper yourself you only need to pay for a primer, a base coat, and a clear finishing coat.
If this was all you have to pay for doing the job yourself would cost you around $60. And you would have leftover material to redo the job a few more times before you need to purchase new paint.
However, the calculation above doesn’t count two key components of the DIY bumper painting job.
- The tools
- Your time
Your Time
Let’s deal with your time first. Obviously, you won’t be charging yourself for the time it takes to do this job. But you should be aware that this can be a very time-consuming process.
Especially the first time around. If you are really strapped for time then you may be happy to pay a shop to do it, for the convenience of outsourcing something so time-consuming.
The Tools
Purchasing the tools needed for this would cause the price to rocket up. If you’re interested in continuing to paint your car bumper for a long time then investing in these tolls would be very worthwhile.
Quick wins for a faster PC:
Repair Windows errors before they cause bigger problemsFix Now →Scan for outdated or missing drivers - takes under a minuteDriver Scan →Clear out junk files and repair common Windows errorsFree Scan →However, if you’re only thinking of doing this job in the short term then you may want to look into renting these tools rather than purchasing them.
Costs per Square foot – professional vs DIY
Some garages charge by the square foot. So we will also look at the costs of painting your bumper by square foot.
What is the average square footage of a car bumper?
Rank #3

- Use for a variety of indoor and outdoor project surfaces including wood, metal, plaster, masonry or unglazed ceramic
- Water-based acrylic formula is low odor, resist chips and provides long-lasting protection
- Covers up to 120 sq ft and dries to touch in 30 minutes for quick project completion
- Semi-gloss finish minimizes surface imperfections, goes on smoothly and provides excellent hide
- Prior to application sand surfaces with 180/200 grit sandpaper, then wash with a degreaser, allow the surface to dry and apply paint
Well, the average car is 6 feet wide, and the average bumper is one foot tall. So the average surface area of a bumper will be 6 square feet.
If you are looking to take your bumper to be professionally painted in a shop then it is going to cost you between $50-$75 per square foot.
However, if you are looking to do this job at home then it will cost you around $6-$7 per square foot. This estimate excludes tool cost or rental.
Summary
Painting your bumper yourself is considerably cheaper than sending it into the shop. Even if you had to purchase your own set of tools to do the job, you could still be saving up $200 every time you paint your own bumper.
Having your bumper painted professionally could cost you anywhere from $200-$400, coming in at around $65 per square foot.
Painting your bumper yourself will cost you around $40-$60, coming in at just over $6 per square foot.
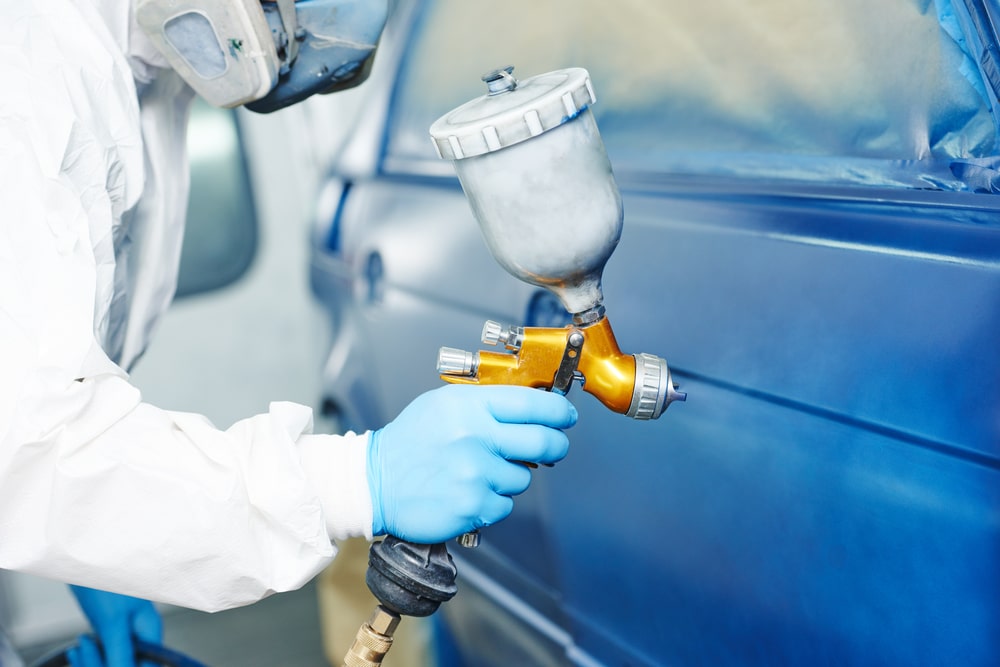
How to Paint Your Bumper Yourself
Now that we have done all the math for you, we thought we would be extra helpful and talk you through the process of a DIY paint job.
In this section we will be covering all the paint and equipment you will need to perform this job. As well as giving out some tips on how to make this DIY job look like the professionals actually did it.
What paint will you need?
To perform this job you will need three types of paint:
Quick wins for a faster PC:
Repair Windows errors before they cause bigger problemsFix Now →Scan for outdated or missing drivers - takes under a minuteDriver Scan →1. Primer
Primers are designed to extend the life of your paint job. However, there are a few other benefits for using a primer:
- Prevents rust
- Speeds up drying times of subsequent coats
- Can be smoothed down to create an even base
- Prevents the metal of your car from absorbing any of the base coat
- Basecoats will build better, and become more opaque on top of primers
2. Basecoat Paint
This coat is purely for color. A basecoat does not have any waterproofing, hardening, or strengtheners mixed in with its pigments. It is important that they are painted onto a smooth, dry layer of primer.
Rank #4

- ALL-IN-1 PAINT & PRIMER: A hardy multi-purpose and multi-surface one-coat paint and primer in one for almost any indoor or outdoor surface. A wall, ceiling, floor, skirting board, cabinet, furniture and door paint for your bathroom, kitchen, home and garden.
- DURABLE & VERSATILE: A highly pigmented, thick formula available in 12 bold colors and a Matte, Satin or Gloss finish. Ideal for interior and exterior paint jobs on wood, laminate, plastic/UPVC, metal, concrete, brick, masonry, stone, glass and more.
- EFFECTIVE MONEY & TIME SAVER: A quick painting solution for DIY or professional builders and painters; our luxuriously opaque formula requires just 1 coat and is fast drying for a premium finish.
- ADVANCED ECO FORMULA: Our UK-made chalk paint is water-based, non-toxic, low odor, and has low VOCs for an environmentally friendly decorating choice.
- EASY APPLICATION: Remove dirt with a damp cloth, wipe the surface clean and dry, sand/score the surface (optional based upon the finish required), stir to mix the color and paint with a brush or roller.
And sealed off with a finishing paint as soon as the basecoat has dried off. In moisture in this layer can cause blemishes and peeling.
3. Clear Finishing Paint
This will be the final paint that you apply to your car. This is the paint that brings the elements of protection to the paint job. This step cannot be skipped.
These clear paints even have UV protection in them. One of the most common causes of dull paintwork on cars is sun damage.
What equipment will you need?
The equipment list for this job is thankfully very short:
- Electric sander (if you don’t have one of these you can use sandpaper and a lot of elbow grease)
- Spray paint gun
- Air compressor (see tip below for an alternative)
- A hammer (if you have any dents)
- Car putty (if you need to fill in any scratches)
Tip – if you’re looking for a way to save on buying equipment, why not use a spray can? This is a great way to avoid having to invest in an air compressor and spray paint gun.
That being said, it can be difficult to source official colors in a spray can. However, if you don’t mind your bumper slightly not matching the rest of the then this could turn your DIY from a $60 job to a $25 job.
Once you have gathered your tools, it is time to start painting!
How to Paint Your Bumper – The DIY Way
Here is a guide to how to paint your bumper:
Step 1 – The Preparation
All the work that you put in at this stage will pay dividends at the end of this job. You should start by removing your bumper from your car.
Next, you will want to bang out any dents your bumper has with a small hammer. You will also want to use this time to fill in gashes or deep scratches with car putty.
After you have done this you will want to use your electric sander to remove the old paintwork from your bumper.
The Tool Desk
Outbyte Driver Updater FREEScan for outdated or missing drivers - takes under a minuteDriver Scan →Outbyte PC Repair FREEClear out junk files and repair common Windows errorsFree Scan →Step 2 – The Primer
Apply a coat of your primer. You will want to use the spray paint gun, or a spray can primer to do this. You want to aim to get as smooth a layer as possible when putting down this coat.
Best Value

- WHAT'S IN THIS 10 PIECE PAINT KIT FOR WALLS: includes one plastic paint tray; one 9 inch roller frame; one 4 inch mini roller frame; two 9 inch microfiber roller covers (1/2 inch nap); two 4 inch microfiber roller covers (1/2 inch nap); one 1 inch flat brush; one 1.5 inch angle sash brush; one 2 inch angle sash brush
- Versatile Application: Perfect for any project, this set includes paint rollers 9 inch for large surfaces and smaller brushes for detail work
- All-in-One Kit: This paint brush set and paint tray combo ensures you have all the paint supplies needed for any home improvement task
- Professional Grade: Get a smooth, even finish with our high-quality paint roller set; ideal for applying interior paint gallon or smaller quantities
- Cost-Effective: This paint brush and roller set provides unbeatable value; includes paint pan and paint trays for easy cleanup and reuse
If there are areas that aren’t as smooth as they should be, get your sander back out and smooth them down.
Allow to dry.
Step 3 – The Basecoat
Once the layer of primer is dry you will want to start adding your basecoat. How many layers are required will depend on the quality of the paint. We would recommend doing at least two layers of your basecoat. This will give your paint job the best chance of lasting for a long time.
Remember to allow the paint to completely dry between each coat. The basecoat is very absorbent and moisture in this layer can lead to peeling, blotchiness, and uneven coloring.
Crashes, No Sound, or Screen Glitches?
Random freezes, missing sound and display glitches usually trace back to one bad driver. Find and replace yours safely.Free scan · under a minutePC Slower Than It Used to Be?
A free scan shows the junk files, broken settings and background clutter dragging Windows down - then fixes them in one click.Free scan · Windows 10 & 11Allow the basecoat to dry before moving onto the next stage.
Step 4 – The Finishing Touches
Now, it’s time to put the finishing layers on. Take your clear finishing paint and apply it all over the bumper. Again we would recommend doing multiple coats, allowing each coat to dry before applying the next.
After the final coat has dried, and you are satisfied with how your bumper looks, reattach it to your car.
Step 5 – Sit Back and Admire Your Handy Work
This is our favorite step. Give yourself a pat on the back because you have now successfully painted your own bumper.
Recommended Free Tools
The Pros and Cons of DIY Bumper Painting
Let’s sum up everything we’ve covered today in this handy pros and cons list:
Pros of DIY Bumper Painting
- You’ll save yourself a lot of money
- You can choose your own design
- You can create a mix of paints that will last a lot longer than a shop or factory job
- Did we mention that you will save a lot of money?
Cons of DIY Bumper Painting
- You’ll need to source the paints yourself
- You will need to buy or rent the tools
- This can be a time-consuming job
Summary – Why DIY is the Way to Go
Painting your own bumper is much easier than most people believe. The most difficult part is sourcing an air compressor and picking out a color that matches the rest of your car.
There are many great reasons to paint your own bumper. But we know you’re here because you want to know how much it will cost and if it will be cheaper than having the shop do it for you.
That is a perfectly good question and we have an answer for you.
Do these 3 things before closing this tab:
1Scan for outdated or missing drivers - takes under a minute2Clear out junk files and repair common Windows errors3Fix the driver behind crashes, sound loss and screen glitchesIt will cost you around $40-$60 to paint your bumper yourself. This means you could be saving up to $360 by doing the job yourself.

Jim Bettesworth well known for his can-do attitude and often takes jobs other companies were unwilling or unable to do. Experienced and educated in concrete construction and painting jobs. Read More.
Quick Recap
Product prices and availability are accurate as of the date/time indicated and are subject to change. Any price and availability information displayed on Amazon at the time of purchase will apply.




