Quick wins for a faster PC:
Fix the driver behind crashes, sound loss and screen glitchesFind Drivers →Clear out junk files and repair common Windows errorsFree Scan →Do these 3 things before closing this tab:
1Clear out junk files and repair common Windows errors2Scan for outdated or missing drivers - takes under a minute3Repair Windows errors before they cause bigger problemsThatPainter is reader-supported. When you buy through links on our site, we may earn an affiliate commission. Learn More
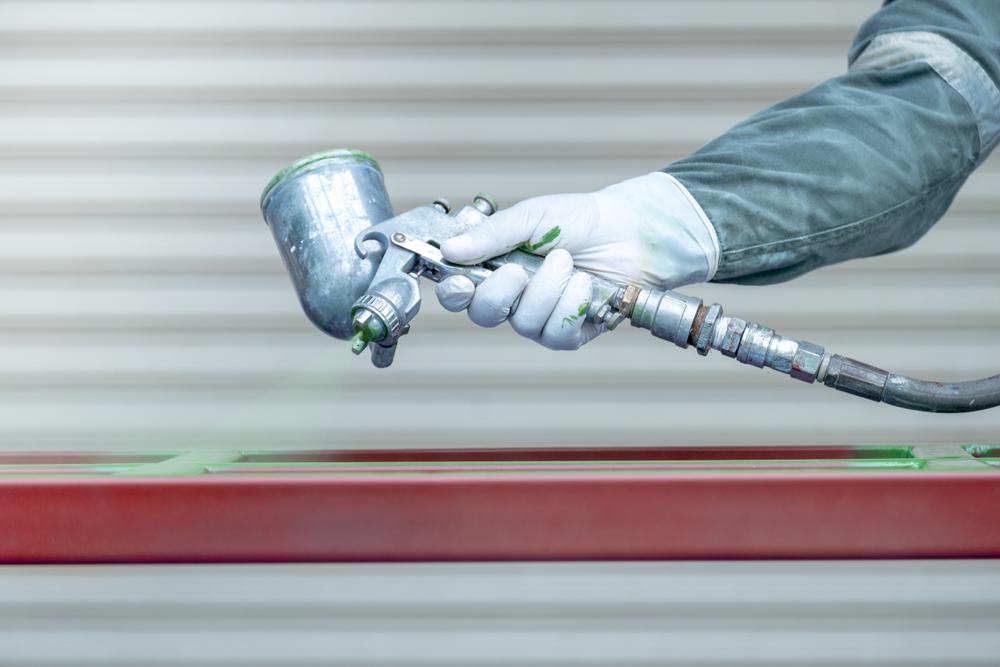
A paint sprayer is one of the most useful tools when decorating your home. It can significantly cut the time it takes to paint large areas and will help to improve your home DIY skills.
As an Amazon Associate I earn from qualifying purchases.
While paint sprayers make painting tasks a whole lot easier, the upkeep of them is somewhat more difficult. You will need to clean it out after every use so it is ready to go again next time.
The Tool Desk
Outbyte PC Repair FREEClear out junk files and repair common Windows errorsFree Scan →Outbyte Driver Updater FREEFix the driver behind crashes, sound loss and screen glitchesFind Drivers →If you don’t clean it, paint residue can build up and jam the system. This will make it far more difficult to use again and you may have to fork out and buy a new sprayer.
#1 Best Overall

- ★ This handy spray guns cleaning kit is all you need to keep your spray guns clean and in excellent working condition!
- ★ The kit works with any thinners or solvents to clean away residuals and sludge from all guns types, including suction, gravity fed, high volume low pressure, detail, touch up, airless and compressor driven guns. Make short work of spray guns cleaning with this great kit!
- ★ Keeps spray guns in top working condition for better painting results.Great for cleaning thin tubes, nozzles, spray guns, tattoo equipment, airbrushes, etc.
- ★ 17 Piece Spray Paint Guns Cleaning Kit comes with everything you require to give your spray guns or air brush a thorough, deep clean.
- ★ Made from fine flexi wire, these brushes will get into all the cracks and creveses that store dirt, grime and contaminates, providing you with the ease to fully clean your spray guns.
Cleaning a paint sprayer requires a little bit of knowledge. To prevent it from clogging or becoming damaged, we are going to guide you through the steps of cleaning your paint sprayer below. Don’t worry! It’s not that complicated!
We will run you through the cleaning process of different types of spray paint in your sprayer and inform you of the correct gear you should wear during the cleaning process.
We earlier wrote a guide about how to clean an HVLP Spray Gun and how to clean a Wagner Spray Sprayer.
Let’s get that paint sprayer clean so you can start decorating as soon as possible!
Before you clean your paint sprayer
There are a few factors to take into consideration before you start cleaning your paint sprayer. Let’s take a look at the protective gear you will need to wear and the best process to avoid any damage to your sprayer.
Preparation
Protective gear
The first thing that you need to do is wear safety gear. Some paints can be very toxic and harmful to your health. You should wear nitrile gloves, protective goggles, and a long-sleeved shirt or smock. Even if the paint you’re cleaning is safe, you should always protect your skin and clothes.
Rank #2
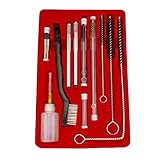
- [COMPLETE]: Full set with 22 pieces for cleaning and maintenance of any air spray paint gun to ensure excellent working condition.
- [EASY ACCESS]: Strong, flexible wire brushes allow for easy access to clean hard to reach cavities.
- [PROTECTION]: Multi-item brush tools clean away any residue for better finishing results and extends gun life.
- [CONVENIENCE]: Maintenance supply equipment is placed in a compact compartmentalized tray for easy storage and visibility.
- [INCLUDES]: 4 pc. wire brush, 5 pc. flexible brush, 3 pc. mini brush, 1 pc. handle toothbrush, 6 pc. micro needles, 2 pc. aluminum holders, 1 pc. lubrication bottle, 1 pc. storage case.
Protective eyewear is critical as paint can easily irritate your eyes and cause temporary or even permanent vision loss.
Do not start cleaning your paint prayer until you have met all of the necessary precautions. Without this equipment, you could end up seriously damaging your long-term health.
Instruction manual
Before you begin, you should carefully read your paint sprayer instruction manual. This is so you can know exactly what to do before you even touch your spray gun. One wrong step could possibly damage or destroy your spray gun and the cost to replace one is not cheap.
Even as you clean your paint sprayer, an instruction manual close by can help you if you run into any difficulties. It will guide you through each step on how to disassemble and clean your paint sprayer so you can know exactly which step you are always on.
Be extra careful when using mineral spirits, paint thinners, or other paint spray cleaners as these can contain harmful chemicals.
Windows Errors? Fix Them Before They Spread
Repair common Windows errors and clear accumulated junk for a smoother, more stable PC - no reinstall needed.Free scan · no reinstallOutdated Drivers Are Slowing You Down
One free scan finds every outdated or missing driver and matches the right update for your exact hardware.Free scan · exact hardware matchWhat you’ll need
The equipment that you need depends on the type of paint you are cleaning out of your spray gun. However, here is a list of the supplies that you will most likely require:
Rank #3

- COMPLETE KIT: Comprehensive cleaning set includes multiple spray bottles, cleaning brushes of various sizes, and specialized cleaning tools for thorough maintenance
- VERSATILE USE: Compatible with multiple spray tools including HVLP gravity feed guns, suction feed spray guns, and detail airbrushes
- PRECISION TOOLS: Features precision cleaning brushes and specialized implements designed to reach tight spaces and delicate components
- STORAGE SOLUTION: Includes multiple graduated bottles for storing cleaning solutions and solvents with clear measurement markings
- PROFESSIONAL DESIGN: Heavy-duty construction with durable brushes and robust cleaning implements for long-lasting performance
- Protective goggles
- Nitrile gloves
- Overalls (an old long-sleeved shirt, smock, old trousers, etc)
- A soft bristle brush
- Mineral spirits (for oil-based paint)
- Water (For water-based paint)
- A paint bucket
- A waste container
- A rag or soft cloth
If you have everything you need, let’s clean that paint sprayer!
How to clean a paint sprayer – Steps
Release Air Pressure
All paint sprayers get their power from the pressure that shoots the paint forward and out of the gun. This requires a pressure relief procedure.
- Engage the trigger guard to not spray yourself
- Turn the paint gun off
- Drop the pressure setting down to its lowest possible level
- Bring your waste container close to the sprayer. Disengage the trigger lock to reverse the pattern of the spray tip
- Point your paint sprayer into the waste container (as close to the bottom as possible) and pull the trigger
- Continue to hold the trigger until you no longer feel any pressure being released
- Re-engage the trigger lock (turn back on) and bring the valve back to the prime or drain position (this depends on the model of paint sprayer you have)
Flushing out the remaining paint
Your paint sprayer will now be safe to work with so you can begin to flush out the remaining paint. This flushing is the best way to get your sprayer’s tubing and canister clear of paint.
Recommended Free Tools
- Remove the tip and tip guard from your paint sprayer
- Remove the drain tube and fluid intake from your paint bucket
- Add the fluid intake to your bucket of flushing fluid (this can be water for water-based paints and mineral spirits for oil-based paints)
- Place the drain tube into the waste container and switch the prime valve to the spray setting
- You can save the remaining paint by pointing the gun into the paint bucket but direct it into the waste container if you don’t want to keep the remaining paint
- Turn the sprayer on and hold the trigger down to gradually increase the pressure. Point to your paint bucket if you wish to save the paint and then switch to the waste container once the stream of paint begins to end. The flushing fluid will begin to spray out of the gun
- Once the paint has run clear and is out of the system (you should only see flushing fluid spraying from the nozzle at this point), release the trigger and turn it off again
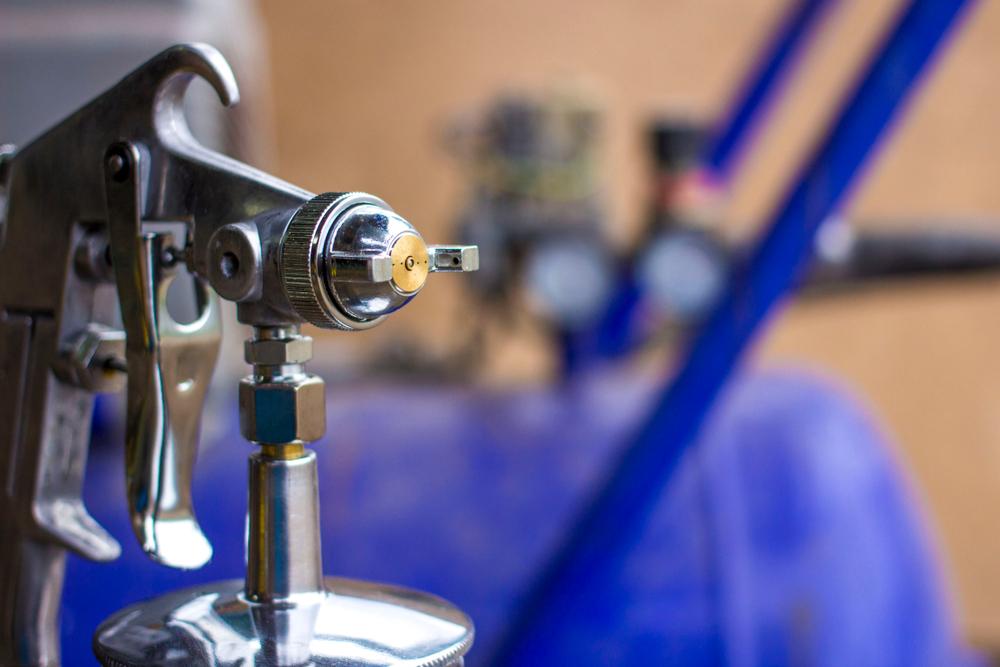
Flushing out your pump and gun
Although the flush fluid has run clear, you still need to get some use from the flush bucket.
To clean the pump:
- Aim the paint gun into the waste container
- Hold the trigger down and turn the sprayer on
- Spray until the flushing fluid comes out clear and no paint contamination is evident
- Turn your paint sprayer off and release the trigger
- Turn the prime valve to prime and turn the gun back on
- Wait as the flushing fluid runs through the pump’s system until it’s clear with no paint
- If the drain tube’s liquid is completely clear, pull the fluid intake out of the flushing fluid
- Turn your gun off
Now you are ready to clean the gun and its components:
- Turn the prime valve to the spray position
- Turn the sprayer on
- Aim the gun into the flushing bucket and release the trigger
- Flushing fluid should be coming out at this point. If any paint is still visible, return to the previous steps
- Once the flushing fluid is all out, turn the gun off
- Hold down the trigger guard and turn the pressure control down to its lowest level
- Disconnect from the power source
- Remove all of the filters from your paint sprayer
Cleaning the filter and the tip
Once the majority of your paint sprayer’s interior has been cleaned, it is time to move on to other parts such as the filter, tip, and tip guard. You’ll be happy to know that this section is even simpler with less turning on and off.
Rank #4

- Universal Compatibility: Works with most common spray tools including gravity feed, suction feed, airless spray guns and airbrushes; suitable for both professional workshop use and hobbyist projects
- Multi-Material Cleaning Tools: Features nylon, stainless steel and brass bristle brushes in various sizes; soft bristles for delicate parts, medium for general cleaning, stiff for dried-on paint residue
- Precision Nozzle & Detail Cleaning: Includes fine hole cleaning needles, extension rods and elbow hooks; reaches tight spaces and clears clogged nozzles without damaging sensitive components
- Durable & Organized Storage: Made with rust-resistant stainless steel and high-grade plastic for long-term use; comes with a clear storage case to keep tools organized and prevent loss
- Wide Application Range: Ideal for automotive painting, furniture refinishing, model making, art projects and any other spray equipment maintenance tasks
Here’s how to clean the filter, tip, and tip guard:
- Place the filters inside the flushing fluid until the paint is largely gone
- Remove any remaining paint with your rag or cloth
- Repeat this with your tip and tip guard
- Remove any hard to reach paint remains with your soft bristle brush
- If you use water as a flushing fluid, you should flush it out at this point with mineral spirits to prevent the risk of ice build-up and rust
- Reassemble your paint sprayer
- Wipe down your sprayer’s exterior parts with a rag that has been soaked in water or mineral spirits
Your paint sprayer should now be completely clean and ready to tackle a project again!
Independent reader supportYour contribution helps us test, update, and keep practical guides available for everyone.How to dispose of used paint
Once you have cleaned your sprayer out, you must dispose of the paint waste responsibly.
You mustn’t pour any of this diluted paint down any drain. Doing this can cause permanent damage to drain pipes and the local water supply.
There will be specific instructions with every local waste disposal group. You must follow these rules to avoid getting a possible fine. However, there are some guidelines that you can follow:
- Ensure that any water-based paint is thoroughly dried before being thrown in the garbage
- Latex-based paint can also be disposed of in the garage, as long as they are completely dry
- Oil-based paints have to be taken to your local hazardous waste facility as this can cause severe damage to your local environment
- Most neighborhoods recycle these days. If yours is one of these, pour your paint out responsibly, wash the bucket, and place the bucket in your recycling bin
- If you have a considerable amount of paint leftover from your sprayer or project, consider donating it to a worthy cause or store it for another task
Depending on your local area’s laws and rules, you should also dispose of your used flushing solution properly too:
Best Value

- EFFICIENT CLEANING: Our airbrush cleaner really gives your airbrush a boost, bringing it back to its best. It tackles those stubborn paint bits no problem, leaving your airbrush super clean.
- UNIVERSAL AIRBRUSH CLEANER: This airbrush cleaning kit is versatile, fitting a range of airbrush types including gravity, side, and siphon feed, and suitable for brands like Badger, Master, Iwata, Paasche, Harder & Steenbeck, PointZero, and more.
- 16 PCS CLEANING KIT: 3 kinds of tools including 10 cleaning needles, 5 cleaning Brushes and 1 golden sharp pick needle, is designed to cater to a wide array of cleaning requirements, ensuring thorough and efficient maintenance for various airbrushes and paint sprayers.
- STAINLESS STEEL CLEANING NEEDLES: 10 needles diameters range from 0.4mm to 1.3mm satisfy all your cleaning need. The gentle, rounded ends are scratch-free for your sprayer and airbrush cleaning.
- HIGH QUALITY CLEANING BRUSHES: 5 brushes ranges 2mm~5mm with good quality nylon fibers, are soft enough to be gentle on surfaces but sturdy enough to effectively remove dirt and grime from your paint sprayer and airbrushes without losing their shape.
- If the solution was just water, you should be able to leave the bucket dry
- If you used mineral spirits to clean your paint sprayer, you may have to drop the spirits off at your local hazardous waste center. This is because mineral spirits are generally considered to be toxic waste and a hazard to the environment. Do not pour it down a drain or into a nearby lake/water supply as you could face a fine and potentially damage the ecosystem
Air or airless paint sprayer?
If your current sprayer has seen better days and you’re thinking of getting a new paint sprayer, you should consider which type is best. It is generally believed that airless paint sprayers are the better option.
Airless sprayers are best when working with thick paints such as latex. These paint sprayers are commonly favored for working on heavy-duty, outdoor painting projects and for general use.
If you regularly use ultra-light paints and work indoors, an air sprayer is probably the best bet. If you’re unsure which is best for your needs, contact a professional for expert advice.
Quick wins for a faster PC:
Clear out junk files and repair common Windows errorsFree Scan →Fix the driver behind crashes, sound loss and screen glitchesFind Drivers →Repair Windows errors before they cause bigger problemsFix Now →In Summary
As you can see, cleaning a paint sprayer can be a little time-consuming but the overall steps are fairly simple. The most important aspects of cleaning your paint sprayer are to wear protective equipment, follow your gun’s instruction manual carefully, and ensure you maintain it after every use.
Consistent maintenance and cleaning is the best method for ensuring your paint sprayer lasts a long time. The last thing you want is to part with your hard-earned cash every time a painting project arises when you could have just taken a few minutes for maintenance in the first place.
Just make sure that you follow our steps and protect yourself from any potentially harmful chemicals lurking in different paints. Follow these guidelines and you’ll be showing everyone else how to clean their paint sprayer in no time.

The Tool Desk
Outbyte PC Repair FREERepair Windows errors before they cause bigger problemsFix Now →Outbyte Driver Updater FREEScan for outdated or missing drivers - takes under a minuteDriver Scan →Jim Bettesworth well known for his can-do attitude and often takes jobs other companies were unwilling or unable to do. Experienced and educated in concrete construction and painting jobs. Read More.
Free tools Windows power users keep installed
One-click scans. No signup required.
Quick Recap
Product prices and availability are accurate as of the date/time indicated and are subject to change. Any price and availability information displayed on Amazon at the time of purchase will apply.




